Saturday, December 26, 2009

Planning ahead.....


I'm almost done with laying track so I'm starting to plan for the next stage; scenery and structures. One of the first structures I want to tackle is Crawford Grain pictured here. I've been trying to find some large grain bins that match these but not had much luck. The Walther's bins are about as close as I can find but aren't anywhere near big enough. If anyone has any ideas, please let me know.

Sunday, December 13, 2009

Lots of progress since my last update!!

I've made a good bit of progress since my last update. Here's a few shots. 

This is a view of the "Louisville" yard on the upper deck. That right hand turnout will lead to one more yard track that will have the Georgia Pacific lead off of it. This is the only track left to install on the upper deck. My goal was to have ALL track in by Christmas. Not sure that I'll make that but I do plan on having all the upper deck done. 

This is a shot of the East end of the Meridian yard on the lower deck. The yard is KCS while the double track on the right is the NS. This yard is complete. The only track left here is a four track hidden staging yard behind the backdrop. The switch for this yard is on the other end of the yard and will go though the backdrop via an industry roll up door. 

This is a shot of the KCS main from Artesia as it approaches the NS crossing at the East end of the Meridian yard. I'm starting to get more bridges in. This is another Scale Segmental Bridge Co. kit that was a joy to build. The double track in the background is the NS, I've got another concrete bridge that I hope to get in next week. 

This is a shot of the Crawford siding and the Crawford Grain spur. This was the last siding that I had to get in on the lower deck. There is very little track left to install. On the lower deck, I've got that hidden staging behind the Meridian yard, another four track hidden staging behind Artesia yard, the Wye track at the North end of Artesia and finally the TXI Cement plant South of Artesia. On the upper deck is that one yard track and the Georgia Pacific track. Once I get all that in, I'll be done with track and ready to move to structures and scenery. I'm ready for that.

Wednesday, November 11, 2009

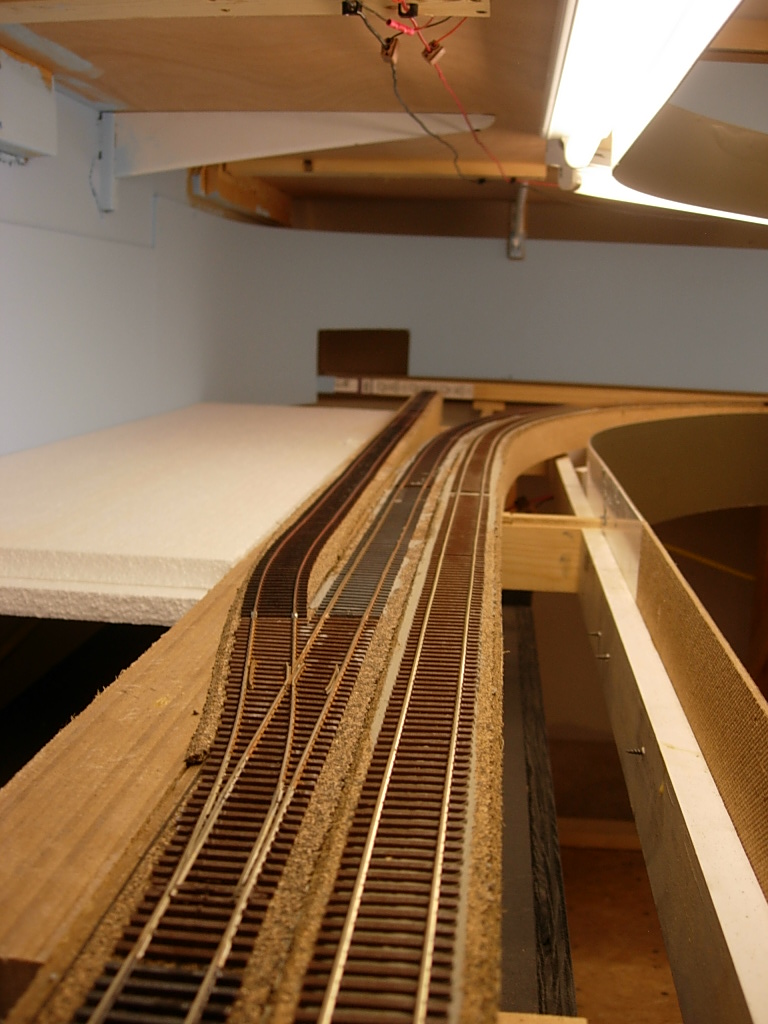
Getting more track down!!!!

Even though the blitz is over, I'm still hard at work getting track down. I've still got the three yards and a few industries left to lay. This week, I've been focusing on the yard at Artesia.  

Here's a prototype view. Notice the four tracks in the upper left of the photo that curve off the the left side of the photo. These are the arrival/departure tracks. Since I'm building on a narrow shelf, I'm having trouble working these into the layout. If you look at the track plan for the lower deck in my first post, you'll notice that I've got one track going through the backdrop as a wye and the other three tracks ending at the back drop. I'm toying with the idea of taking all four tracks through the backdrop to use as staging. I'm looking for any suggestions on this. 

Here's a shot of the North end of the yard on the layout. I've still got the Wye track to lay where the brick at the left edge of the photo is. Also, working on the engine service area where the two bricks are in the background. 

Here's a view from the South end of the yard along the yard lead. In the center of the photo you can see the switches for those arrival/departure tracks. I'd like for them to be fully usable. 

I've also been working on getting the Tibbee bridge in and in service.  Here's a shot of the first train to cross Tibbee. This has been a fun project and it's getting closer to being done. I've got to replace the concrete T-girder section as I broke it during the install. For now, it's superglued together and the track on the bridge is just laying in place held by rail joiners. I'll just have to live with a slow order for a while. The T-girder section and both truss piers are all products from Scale Segmental Bridge Co. Keith at Scalebridge.com has been a HUGE help on this bridge. Both truss piers were custom made for this bridge but are now in his product line. I like having the first production run supporting my bridge. ; ) 

And here's a fun video of the second train to cross. I don't think Tibbee has actually ever had a double stack cross it but in my world it will. 

Wednesday, October 7, 2009

The blitz continues....

We're still making good progress on laying track. Hope to get a lot more done tomorrow on the last day of the blitz.  

Miles is hard at work putting the last piece of the upper level main in. Miles and Fran have been a HUGE help in getting the upper level in. I've learned a lot from them so far and get something new each day.  

Here we see the first train make the loop around the upper level. I can now make a complete run from around the lower level, up the helix, around the upper and back down the helix. I plan to get a clock out soon and time the lap. 

We've also started on the first area to get scenery. This is the HWY 82 underpass. The bridge was scratch built from Rix beams and scale lumber. The abutments were cast with U-30 plaster and the piers were custom done by Scale Segmental Bridge Co. This will be one of my favorite scenes.

Saturday, October 3, 2009

Track Blitz

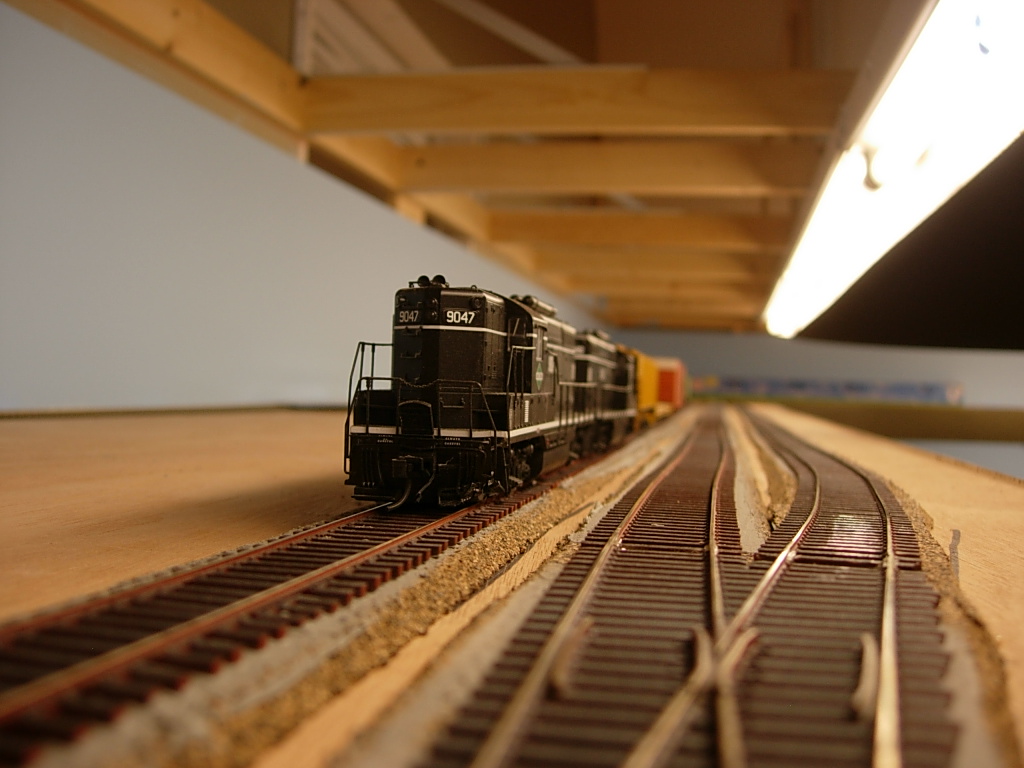
I've got the pleasure of having Miles and Fran Hale down for a few days to help with the layout. We started our track laying blitz this past Thursday and have made great progress. As of this post, we have the upper deck main line in and running from the helix around to the Starkville passenger depot. Here are a few shots of what all has gone on.  

This is a shot of a quick mock up of a farm scene that will be on the upper deck as you exit the helix.  

This is a shot from the end of the upper deck peninsula looking back at the helix.  

Here's a shot of the upper deck wye. The track going through the backdrop will cross over the lift out section and enter the Louisville yard. 

This is a quick mock up of the HWY 182 underpass at Mayhew, MS. This scene will be the first to get scenery. 

Finally, this is a shot of my test locos as they pass the Borden plant in Starkville. More to come soon.

Saturday, September 19, 2009

Catching up on my updates......

It's been quite a while since my last update. I've also gotten quite a bit done since then. First of all, I've gotten about 80% of the fascia and valance up and painted. You can't tell from the photo
but the paint is a CTC green that Tony Koester gave me the formula for. 

The other big thing is the entertainment center and shelves I added under the layout. Painted black, you really can't tell how they're made. Basically, there is a 3'X4' two shelf bookcase on each side of the TV. There will be black curtains below the layout that will hide the chest of drawers on each side. I'll get this in as soon as I finish the fascia. 


I've also continued work on the Tibbee Bridge. The wooden trestle approach is complete. The T-girder concrete section is going to be re-done. The pilings under it are a scale 15'. I want to move them up to 18' to match the trestle. Also, the concrete pier on the North end and the Brick pier on the South end are currently in production at the Scale Segmental Bridge Co. I had a completed brick pier for the South end that looked great but it met it's fate after it was accidentally dropped. 

I've also begun to add in structures to see how things will fit. Here you can see the Borden plant and the Starkville Passenger depot. These two models were built by Rich Cobb and look fantastic. Work has also continued on roadbed spline. I've got about 95% of the spline in. there are only a couple industries that still need spline. I've got a track laying blitz scheduled to start on the 29th. I've got some help that will be in town for a week. We hope to get most of the track laid during that time. I'll post more updates soon.

Friday, July 10, 2009

Getting closer to having a brick pier.....

I had some great tips from several people on several Yahoo Groups on how to do the photo wrap. 

Here's a photo of the real pier. 

I was able to take the above photo and do some serious editing with Photoshop and come up with this photo to wrap.


Anyway, I feel much better now knowing that I'm close to having my Brick pier. 

Going back an editing this page, I realized I never posted a pic of the wrapped bridge pier. Here's just the pier finished.


Wrapping it up

I'm working on the Tibbee Bridge trying to get that wrapped up, literally. Thanks to Keith at "Scale Segmental Bridge Co." I now have the perfect pier for the South end of Tibbee bridge almost..... 

The prototype is built out of brick. So, I have to figure out how to give this pier the look of brick. I feel that I have two choices. First, I could scribe mortar lines and paint the pier. This I feel is my last option because my skill levels aren't that good. I'd hate to mess up a nice casting as Keith has made. So, I figured I'd try option 2 which is to do a photo wrap. 

As you can see from the photo, the pier is slightly tapered and rounded on each end. It will be viewed from one rounded end so I want to wrap the photo so that there is only one seam and it's on the back side of the model on the other rounded end. I want to wrap this photo around the pier....  To do so and have the brick and mortar remain level and parallel,

Tuesday, May 12, 2009

Lots of rain outside = Lots of work on the layout inside!!!

With all the rain we've had lately, it's "forced" me to stay indoors and work on the layout. I've been getting about 6 hours a day in on it and making good progress. The sub-roadbed spline work for the upper deck main is in and planed smooth. Sidings and spurs are next. The spline was made from 1/8" Masonite cut into 7/8" strips then glued together. I got this technique from Joe Fugate and love it. I like how the Masonite automatically forms the transition curves for a smooth flowing base for the track. 

I started working on getting the spline in for the sidings and spurs by taking my track plan and a ruler and just measuring where the switches should go. I decided that I wanted to be a little more accurate than that so I printed part of my track plan at 1:1 scale. This printout turned out to be 20" wide and 500" long. I do CAD work on the side so I was lucky to have a wide format printer. Here you can see the printout as I have it laid out exactly where the track will go. The plan matches up PERFECTLY with my spline I laid by measuring. So, I guess my measurements were accurate enough. I'm going to mark the locations of the switches then begin laying the spline for the sidings and spurs. More photos soon. 

Tuesday, May 5, 2009

Lots of progress

The last few days have seen a lot of progress on the Aberdeen Sub. I've completed painting the backdrop......I think. 

I'm trying to decide if I want to add clouds and a horizon or just leave it as is. Originally, I had planed on it just being a plain blue but now I'm thinking of feathering in some white haze and maybe adding those clouds. Not sure yet. 

I've also started laying the spline roadbed for the upper deck and have made good progress there. If I work like I did today, I should be able to get about 16' of spline in each day. I'm limited by glue drying time and the number of clamps I have to hold it together but this has worked to my advantage. While the glue is drying, I work on other items then come back to continue on spline, let glue dry and work elsewhere and on and on. 

In doing that today, I was able to get some of my wiring cleaned up and secured, build under-layout shelving for my DCC components, build a pull out desk for a laptop to run DecoderPro and pull all the wiring for a new 110 volt circuit to feed the DCC system.  When I built the house, I had two dedicated switched circuits for the layout room. It turned out that this was not enough power. My layout lighting takes up those two circuits. The new circuit will also be a switched circuit to track power. When complete, I'll be able to hit three lighted switches when I leave the room and know that everything is off. This will be nice to during construction as I can turn on my layout lighting yet have the track dead so I don't have to worry about tools laying across the rail.


Saturday, May 2, 2009

Painting the back drop

My third attempt at a backdrop is going well now. The Komatex has worked out great. 

For the seams, I used green Squadron putty. I squeezed on a bead of putty and smoothed it with a straight edge and let it dry over night. This morning, I sanded it with some 200 grit sandpaper on an orbital sander. That method worked GREAT. 

This is the first coat of paint and as you can see, the seam is GONE!!! You can see a chip at the bottom where the two pieces meet. 

The last shot is just an over all shot of the two decks. The top painted and the lower yet to be painted.  

Wednesday, April 22, 2009

Backdrop number three!!!

Here goes my third attempt at getting a backdrop material put in that I'm satisfied with. 

This time, I went with 4X8 sheets of 3mm Komatex. Its a sheet made of expanded ABS "foam" sandwiched between to thin sheets of ABS plastic. So far, I really like it. I first put in some extra support on the benchwork. The Komatex is very flexible so I wanted the extra support in hopes that it won't buckle like my Masonite did. After that, I applied liquid nails to all the supports then just stuck the Komatex to it and it stayed. At each joint, I added a 4" wide piece of Komatex to the back of the backdrop glued on with plumbing "all purpose" glue. It holds like a charm. 

I'm going to fill the small gaps at the joints with squadron green putty. I'll post more photos as I clean up the joints and paint. For painting, I'm thinking of renting an airless spray painter. 

Just to get a feel of how smooth it was, I tested it with a backdrop structure. To me, it looked like a good fit. So, for now, Komatex seems like a winner. More photos soon.

Thursday, March 12, 2009

Bent problem solved....help with Brick Pier!!

I had tons of replies about the 6 post trestle bents and that issue is now solved. I've got a Black Bear Construction Co. 6 post trestle bent jig on the way. That should make fast work of building the 22 or so bents for the approach trestle. 


My next issue in getting the Tibbee Creek Bridge as close to the real thing is the brick bridge pier on the South end of the bridge. I've looked and looked but haven't found an HO scale model that even comes close to this. About the best thing I found was a two tier stone pier. So, I'm looking for any ideas or help on modeling the brick pier like in these photos. 

Wednesday, March 11, 2009

Tibbee Bridge

I'm about to get back to work on the Tibbee Bridge. Before I go further, I'm trying to find some scale drawings of bents used in the wooden approach trestle like in the photo here. These are 6 post bents on an ex-GM&O line. I want some HO scale drawings so that I can build a jig to quickly build many bents. Also thought I'd throw in these photos of the bridge. 

We had a LOT of rain lately and the water got higher than I've ever seen. Got a "normal" level photo to compare to. Also, take a close look at the bridge and the track on the North end. You'll notice another oddity for our area. SNOW!

Monday, February 16, 2009

Lot of work......

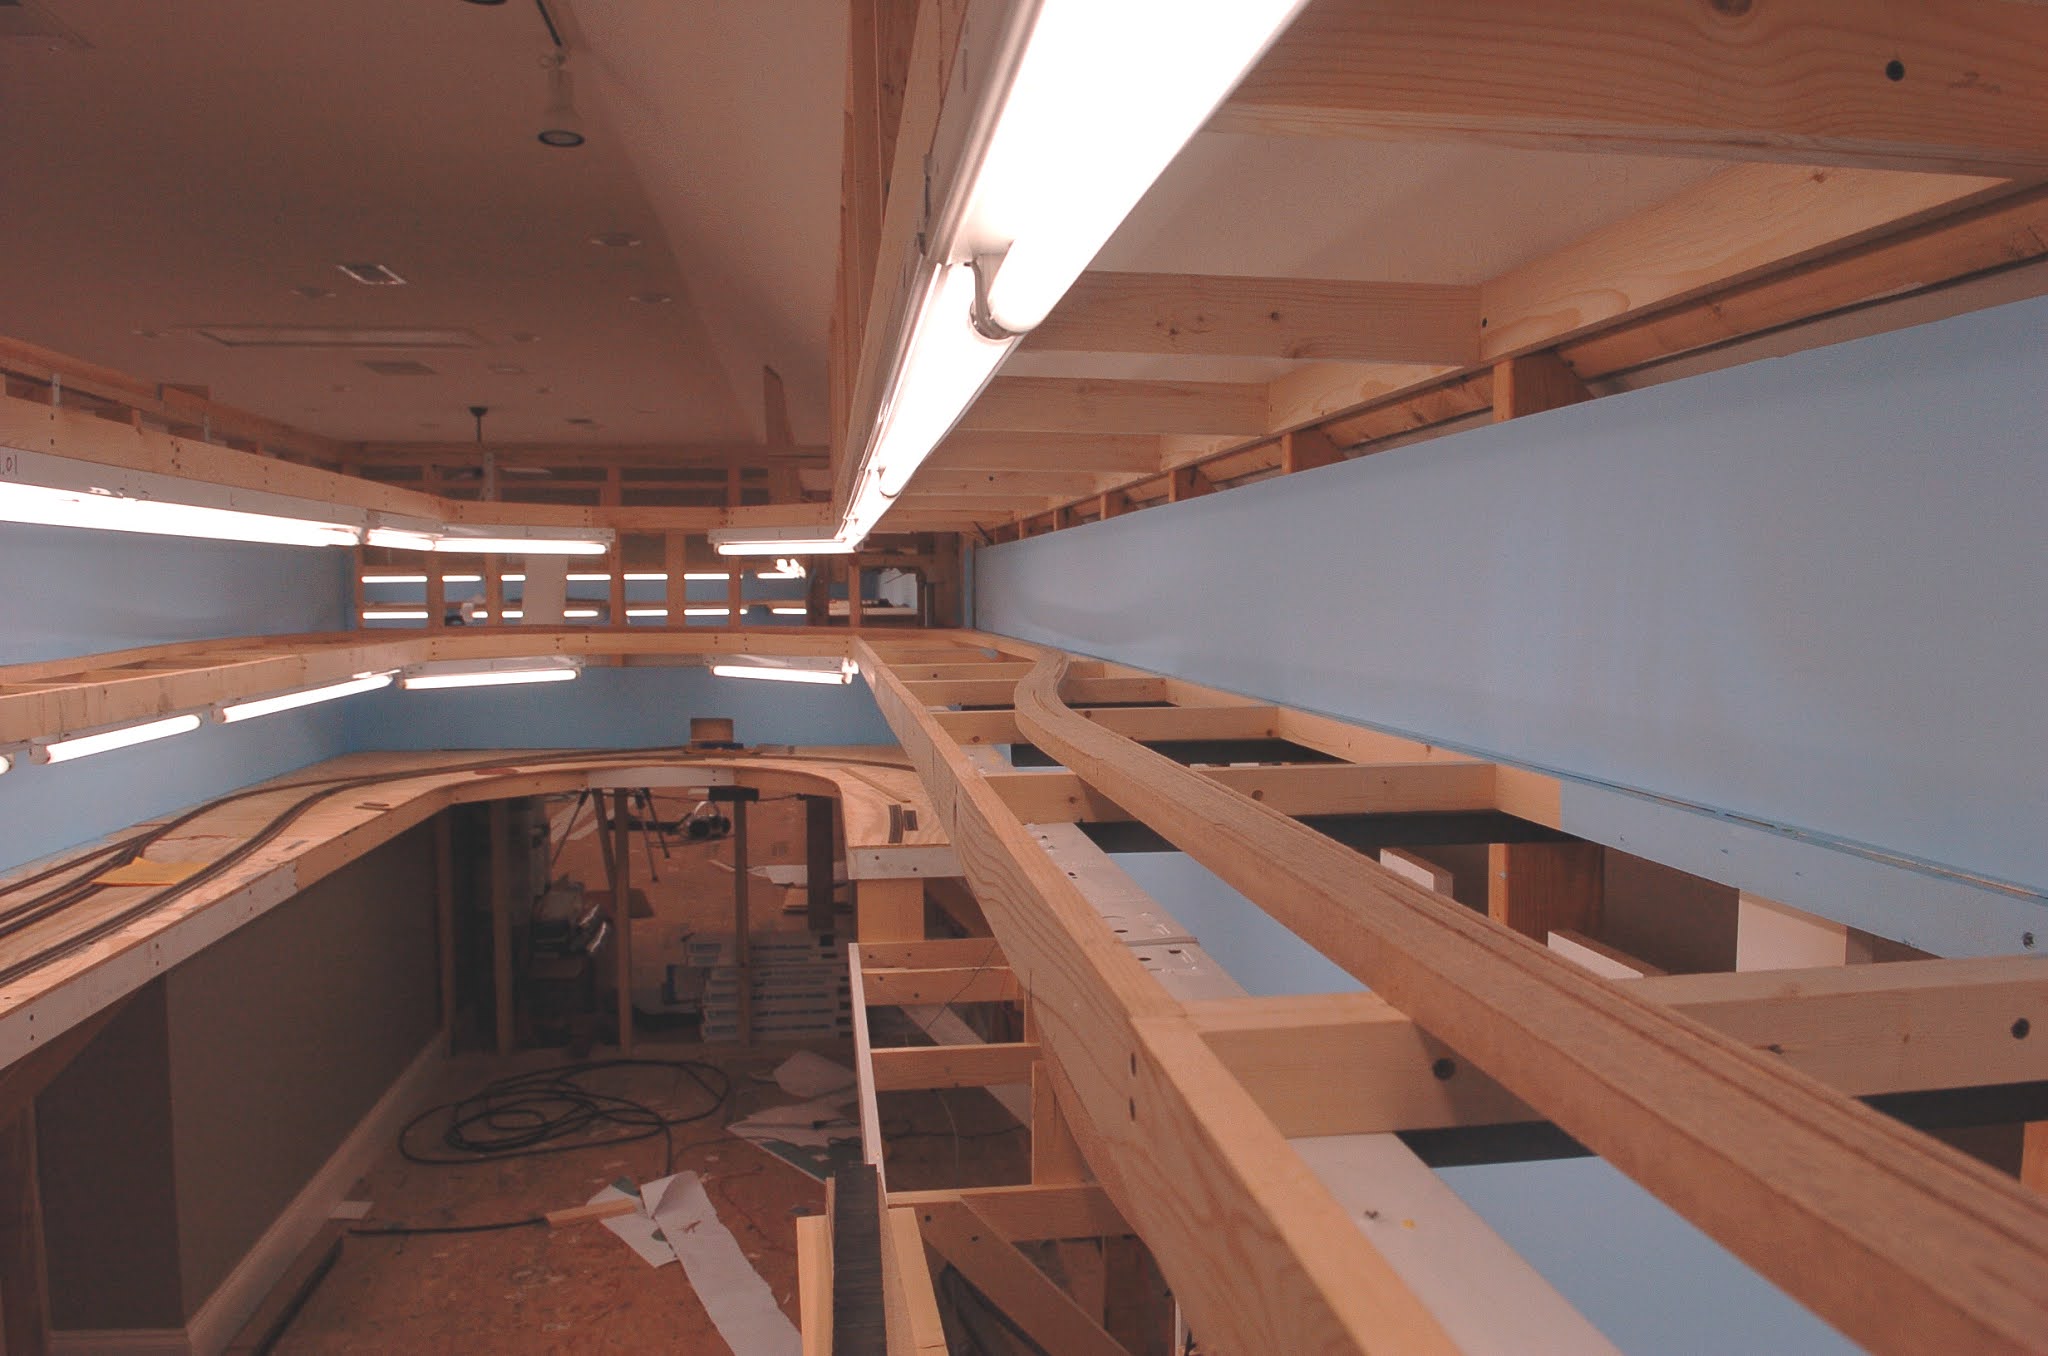
I've been lucky to have a lot of free time lately. I've used a good bit of that time to work on the layout. The two big things I've done are: Finish all benchwork and install most of the lighting. 

On the benchwork, I got the upper deck in and mostly complete. I've still got a little bracing to do for the upper. This bracing is the angle iron that I pictured in an earlier post. I used some "track type" shelf brackets every 8' to provide most of the support for the upper deck. To add extra support, I'm adding in the angle iron every 24". It's slow going as I have to custom fit each piece and drill mounting holes. I hope to get most of that in with the next week or so. 

The upper deck lighting valance is also complete and mostly braced. To brace it, I used some shelving "L" brackets mounted upside down from above. You can see that in the photos to the left, especially in the photo of the peninsula. 

For the lighting, I'm using strip florescent lighting composed of two bulb 8' sections and single bulb in 4' and 2' lengths. The bulb I chose was an SP35 which to me offered a good balance of brightness and warm sun look. Once I get the lighting and bracing complete, I want to get the backdrop in place on the upper deck and then get them both painted. After that, it's back to laying track.

Friday, January 9, 2009

LIghting it up......

I've continued with construction of the 2nd level benchwork. It ground to a hault when my local lumber yard quit carrying 1X3X16 lumber. I'm now trying to get them to special order me some. If not, I'll have to head to the local Big Box store and get some "not so good" 1X3X8. Until then, the upper deck is on hold. In the mean time, I decided to start working on backdrop and testing lighting. 

For the backdrop, I'm using 1' X 78' strips of vinyl flooring with the back side showing. It's then painted a "sky" blue. Once it's all up, I'll come back and feather in some white to simulate the haze in the sky. 

I've also hung up some test lights just to see how things look. Right now, I've got two fluorescent strips and a CFL bulb with different color temps in place. I've got my local electrical store ordering me a 10' strip of commercial grade, high output, LED rope lighting matched to the color temp of my room track lighting. I'm hoping it will work as it would be an easy install. I'll post more when it comes in next week or so. So far, the CFL that's been in experiment role is a GE Helican 26 watt warm white. I started with two florescent strip lights in a daylight 6500K temp. These made for some bright, vivid scenes but had a blue hue to them. I decided to throw in the warmer CFL to see what it would do and loved the results. The florescent strips give good, bright lighting while the warm white CFL warms the scene. If the rope light does not work out, then I'll do the tube florescent-CFL combo or get some full spectrum CFLs and pair them with a warm white every 24".

Been a slow layout week...

I've had a slow week working on the layout as I got involved in a few DCC installs on some locomotives. One thing I've learned is DC...